In new PHP 7, old style PHP 4 constructors will be removed as you can see in this RFC Voting. This voting has started a huge discussion about it on this Sitepoint article and in the wider community.
Generaly, I was tired that people were fighting over this small insignificant thing, so I spent an hour and created this PHP script that will find all old style constructors and convert them to proper __construct constructors. All you need from github repo is index.php.
Example usage: php index.php /absolute/path/to/your/root/folder/
WARNING: Don’t forget to backup your files before starting script. And make sure that script has read/write rights on the files.
LiveReload is a tool that applies your HTML, CSS and JavaScript changes to Firefox, Google Chrome or Safari without having to reload the page. With LiveReload, developers can avoid manually refreshing a page using Ctrl + R or F5. It also allow us to do some pre processing (like SASS or LESS compiling) before it fires browser refresh.
LiveReload works by monitoring files you are editing and as soon as you save your work it detects it and refreshes connected browsers.
Installing LiveReload
1. First we install Ruby and Ruby dev packages sudo yum install ruby ruby-dev
2. Then we have to setup needed Ruby gems sudo gem install bundle
sudo gem install guard
sudo gem install guard-livereload
3. Inside your project folder add new file with name “Guardfile” and put this code inside guard 'livereload' do
watch(%r{.+\.(html|php|css|js)$})
end
Which will tell guard to monitor changes for files with html, php, css and js extension.
4. Now start Guard LiveReload from project folder guard
5. In next step, you need to install LiveReload browser extension. You can find list of supported browsers and links for extensions installation on this FAQ page over on LiveReload site: LiveReload FAQ Browser extension installation
For Firefox you will have to use extension from previous link because version from Mozilla Addons site because it’s too old and it doesn’t works with Guard.
After you install you will get new icon in your toolbar on which you need to click so it will connect to Guard LiveReload.
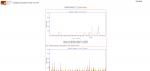
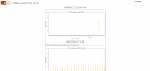
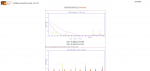
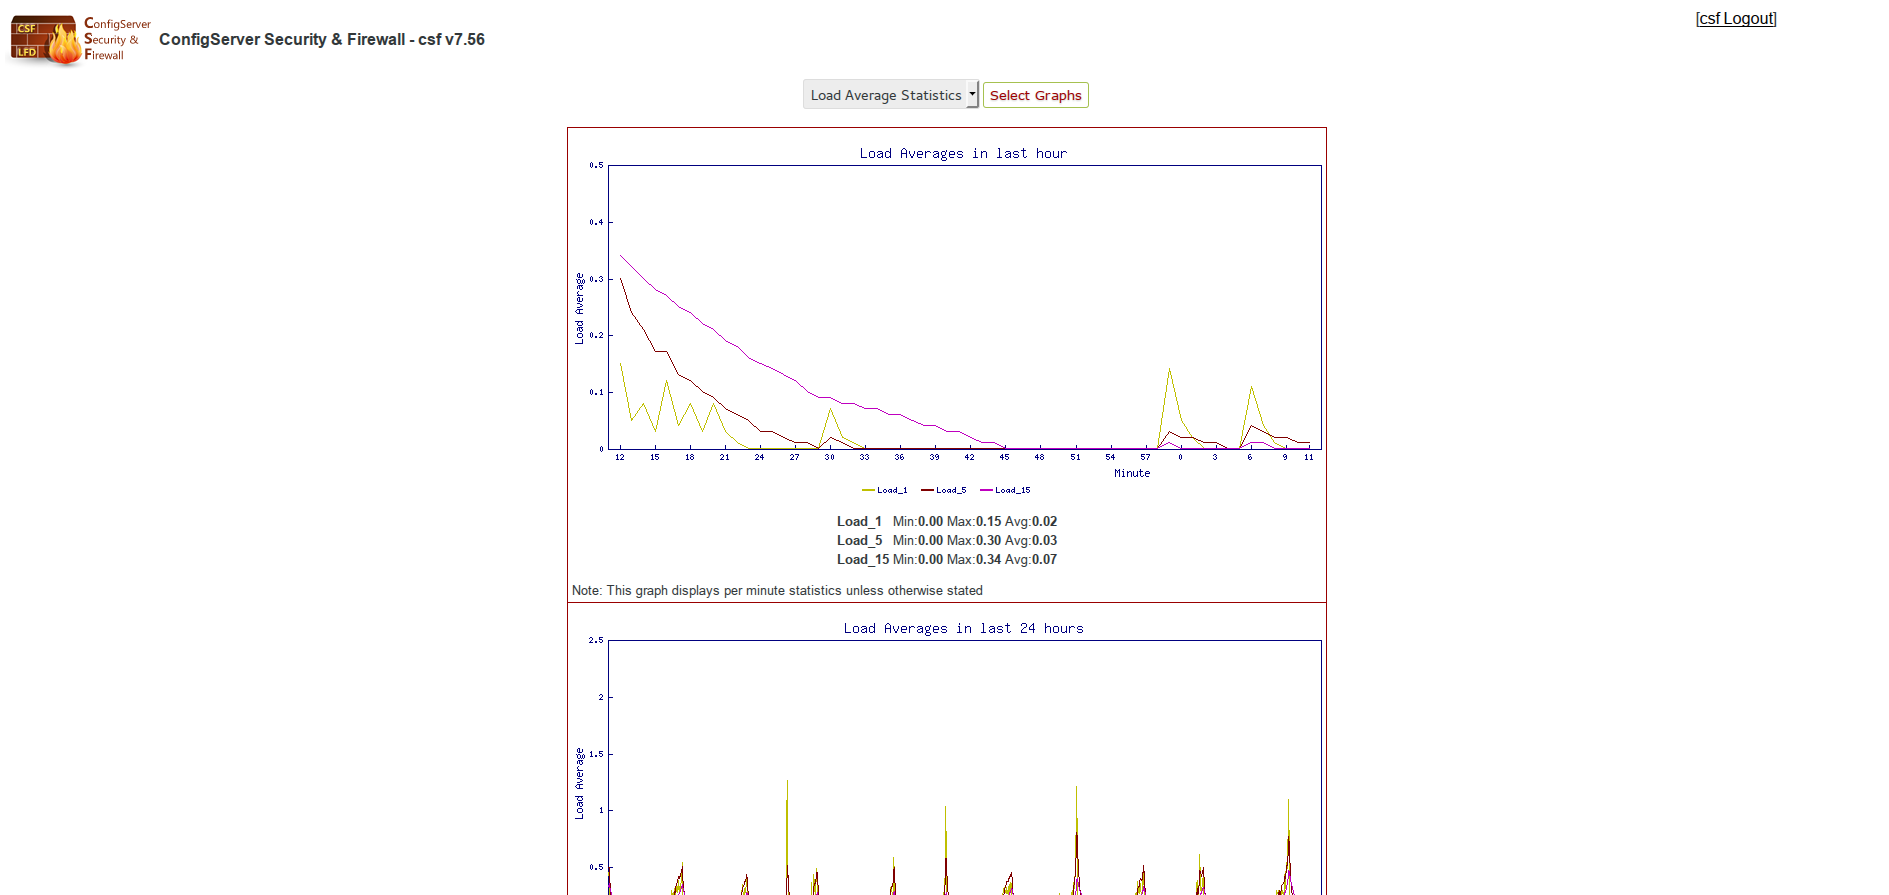
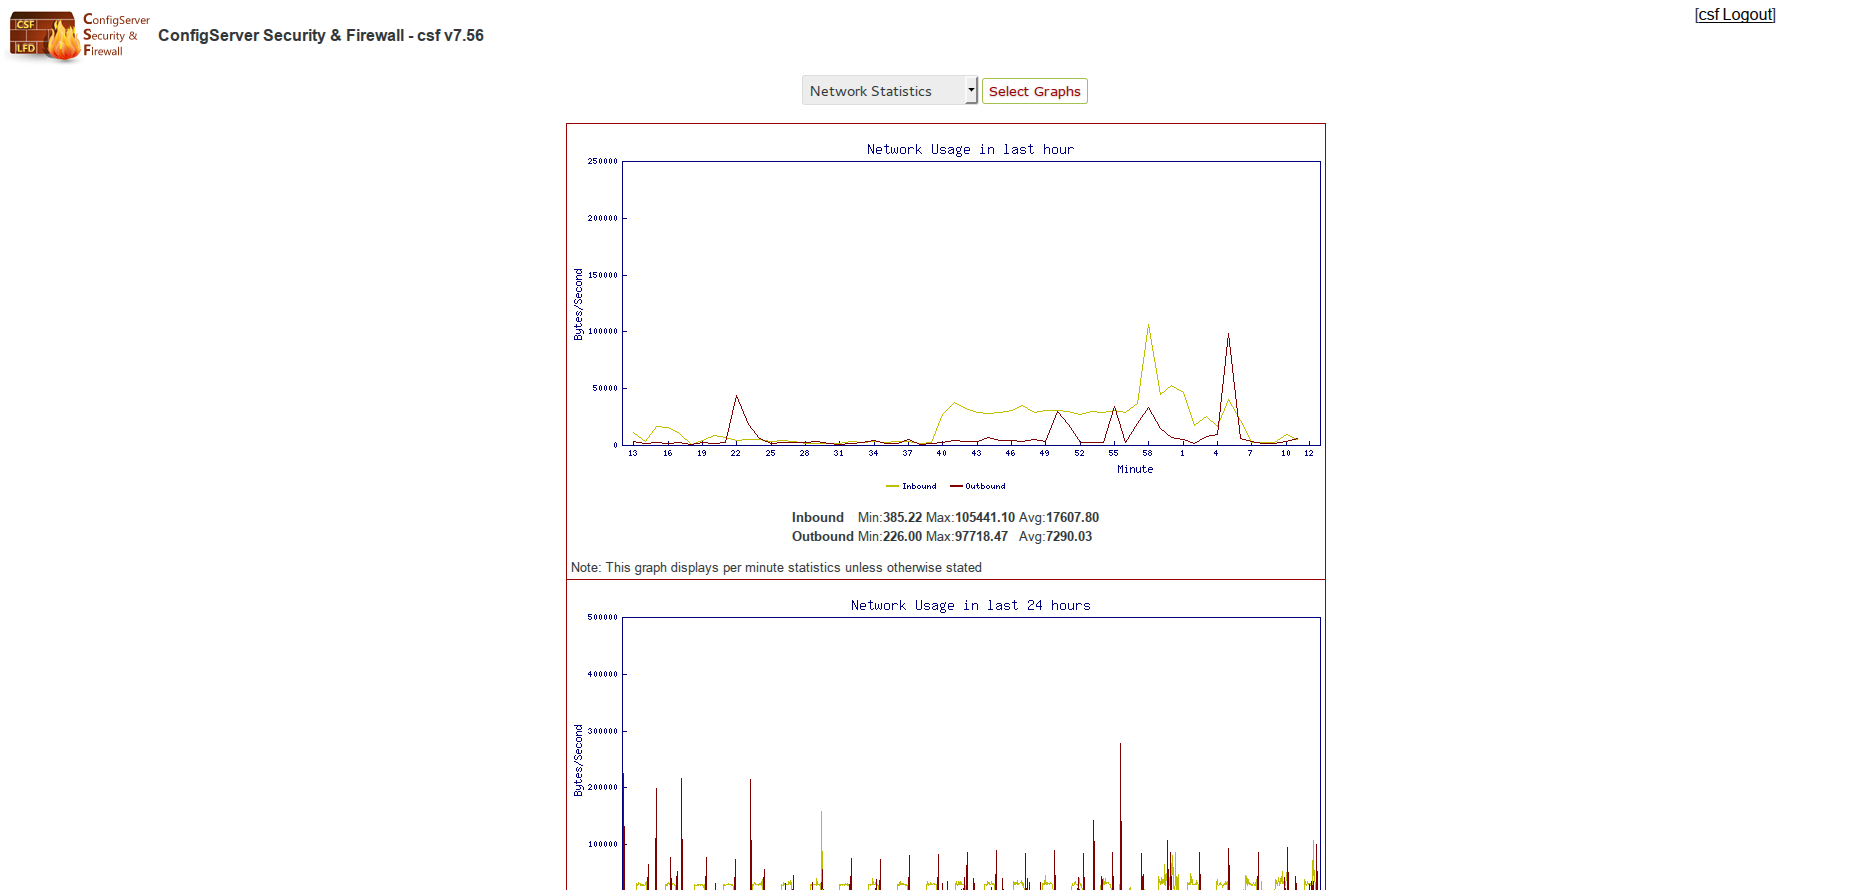
CSF Firewall except being very cool firewall manager, has also a very nice statistics module. It can monitor load, cpu, memory, I/O load, network, email statistics (on Exim only) and MySQL. What is also great it is very easy to enable it. So let’s not waste any more time and do it.
Installation
First you need to edit your CSF Configuration. You must edit CSF Configuration that you can usually find on this path /etc/csf/csf.conf. You must find variable “ST_ENABLE” and change it’s value from 0 to 1.
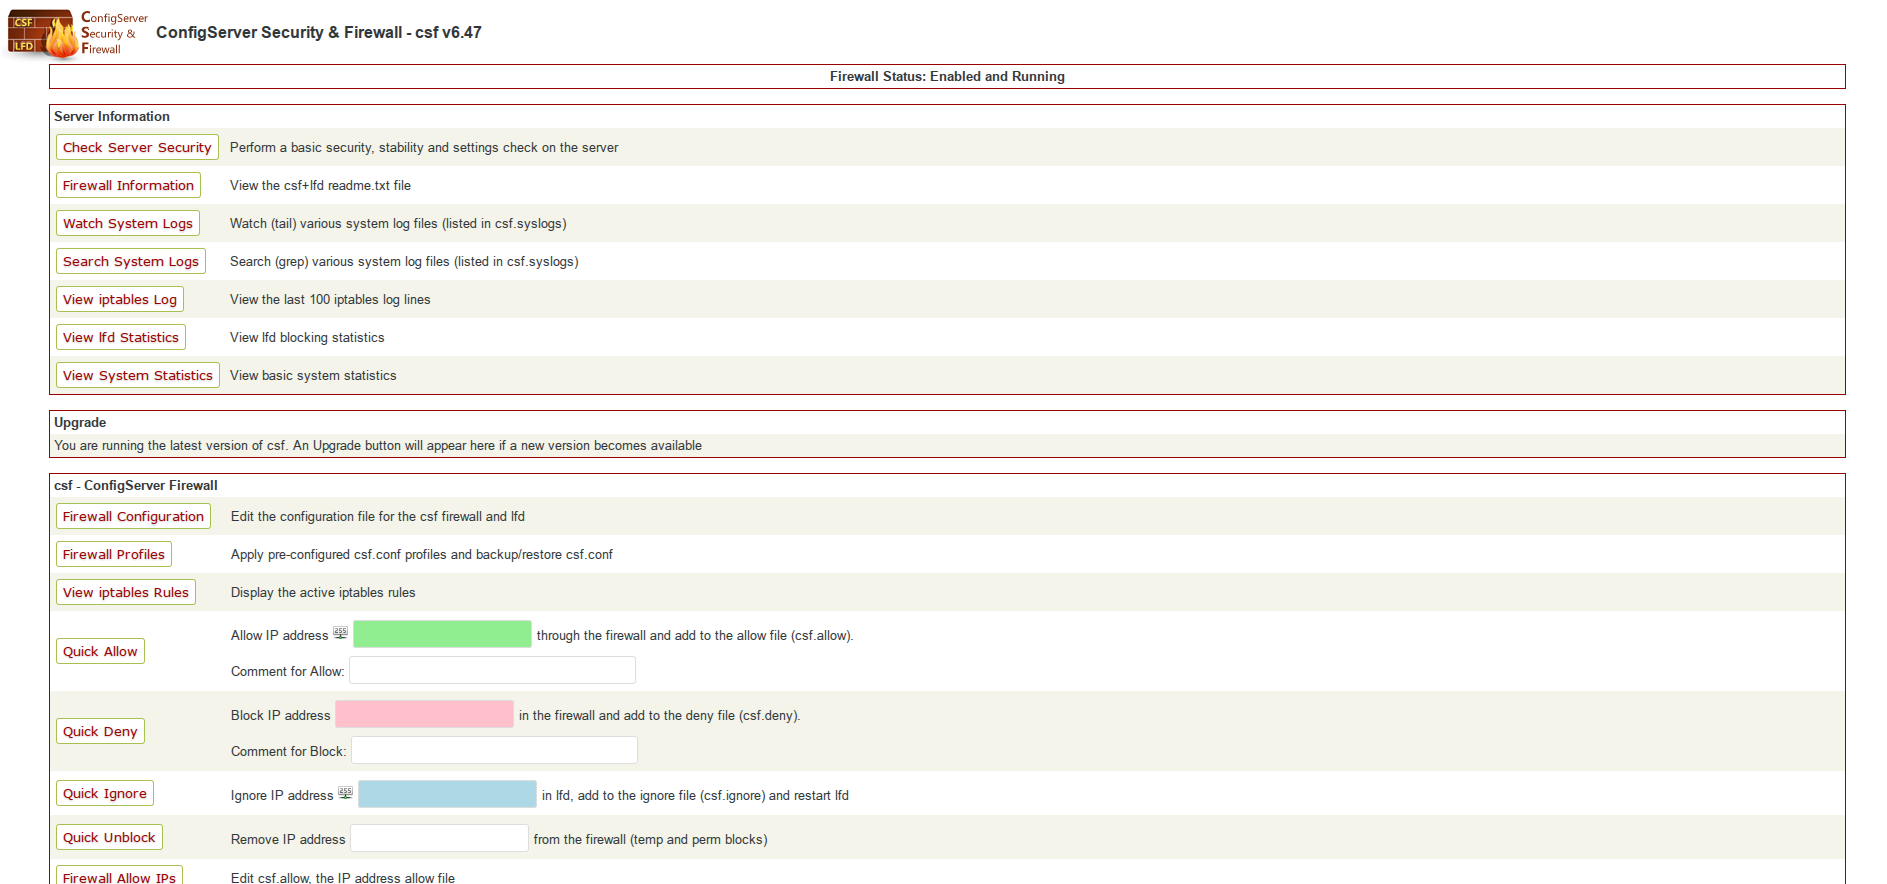
After you save file, you need to restart csf and lfd from command line: csf -r /etc/init.d/lfd restart
If after this you still don’t see “View System Statistics” button in CSF UI, you will probably need to install this two perl modules: yum -y install perl-GDGraph perl-IO-Socket-SSL
Config Server Firewall (or CSF) is a free and advanced firewall for most Linux distributions. Except filtering packets – CSF includes other security features, such as login/intrusion/flood detections and server performance monitoring. CSF has it’s own UI, but it is also easily integrated into UI of cPanel, DirectAdmin and Webmin.
CSF is able to recognize many attacks, such as port scans, SYN floods and login brute force attacks on many services. It is usually configured to temporarily block clients who are detected to be attacking the server and after three temporary blocks it becomes permanent block. This behaviour, as well a lot of different configurations can be changed via command line or by using CSF UI.
Full list of CSF abilities and features, as well list of support operating systems can be found here.
Installation
First download CSF wget http://configserver.com/free/csf.tgz
Unpack archive and navigate to CSF folder The meta description is under 120 characters, however up to 156 characters are available. The available space is shorter than the usual 155 characters because Google will also include the publication date in the snippet.
The keyword / phrase does not appear in the URL for this page. If you decide to rename the URL be sure to check the old URL 301 redirects to the new one!
The copy scores 50.9 in the Flesch Reading Ease test, which is considered fairly difficult to read. Try to make shorter sentences to improve readability.
There are 294 words contained in the body copy, this is slightly below the 300 word recommended minimum, add a bit more copy.
tar -xzf csf.tgz && cd csf
Install CSF sh install.sh
The firewall is now installed, but you should check if the required iptables modules are available. perl /usr/local/csf/bin/csftest.pl
The firewall will work if no fatal errors are reported.
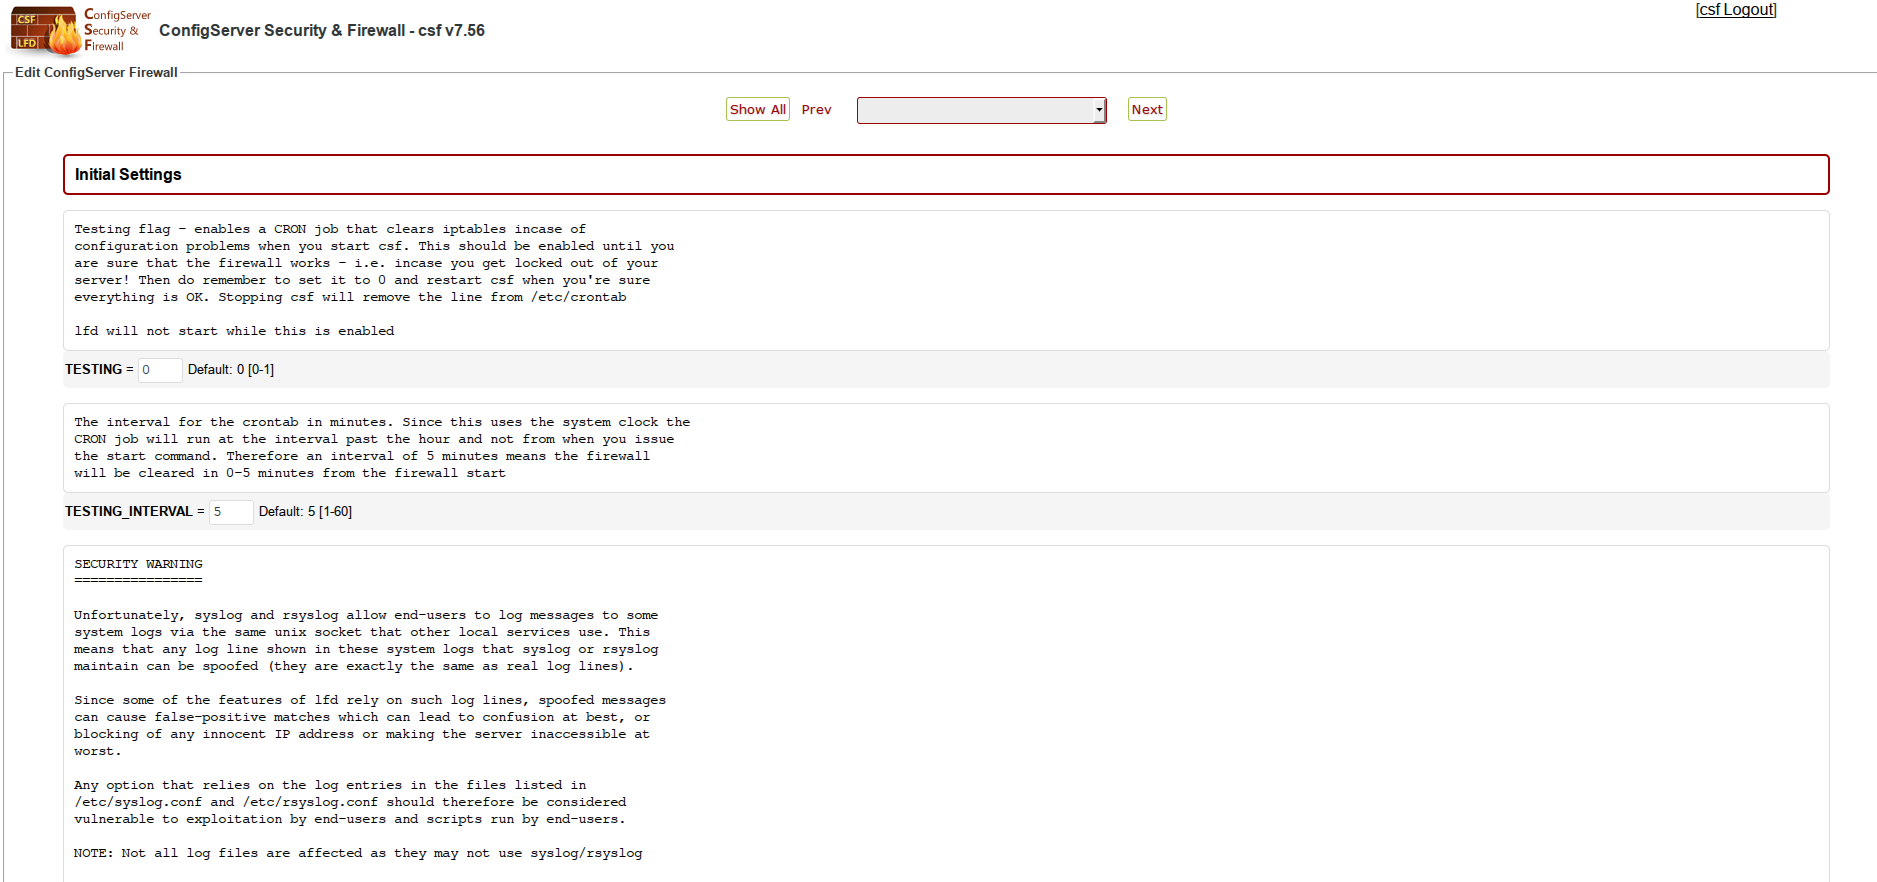
If possible, your IP address will be added to the whitelist. Additionaly SSH port has been opened automatically, even if it uses custom port. The firewall was also configured to have testing mode enabled, which means that the iptables rules will be automatically removed five minutes after starting CSF. Now you can configure CSF: vi /etc/csf/csf.conf
After changing and testing your configuration and you think it is ready for production it is time to disable testing mode. Edit CSF main configuration file and find variable “TESTING”, then change it’s value to “0” and restart CSF with command: csf -r
Some time ago, after a lot of research and reading on the subject, we decided to switch from Apache web server nginx. Since switching from one software to another is never easy after a few busy days, we managed to switch all servers to Nginx + PHP FPM combination. Initial tests we did before crossing and after were totally surprising by their results.
It is simply amazing how the combination of Nginx + PHP FPM load pages faster and uses much less server resources.
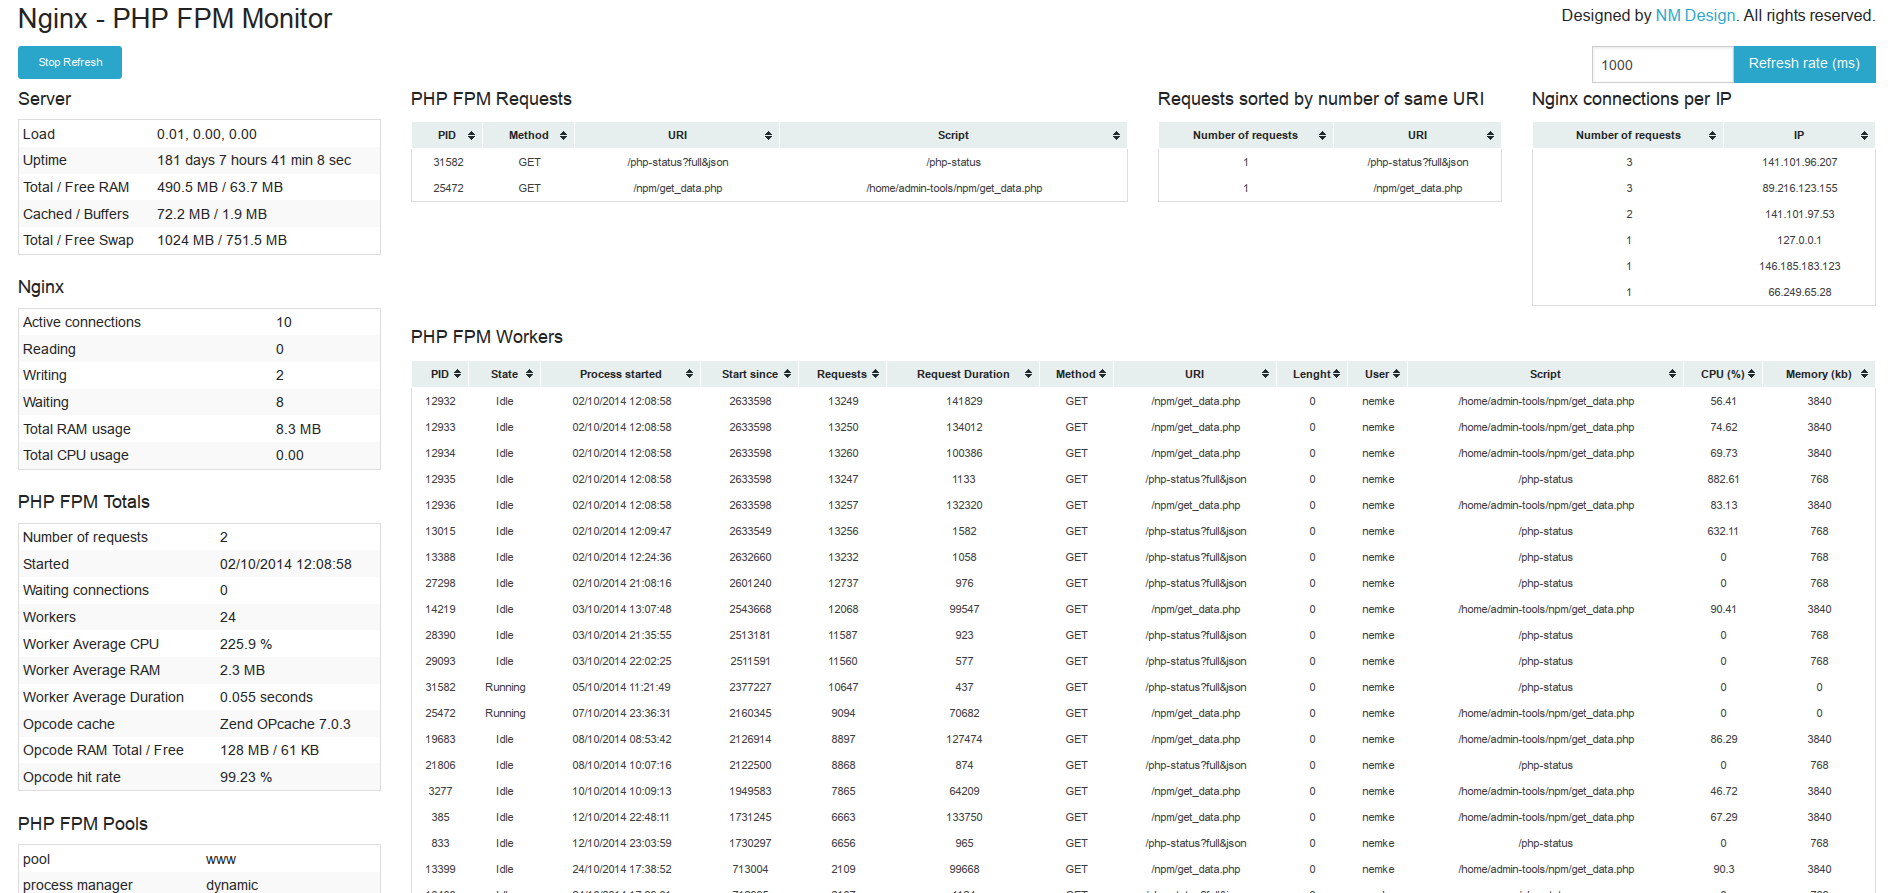
The only thing we lacked was the Apache’s full status. Nginx and PHP FPM have their status page, but they are not detailed as Apache’s. Also, we didn’t manage to find some nice web interface that will parse status data and present it, so we decided to write our small web interface.
We decided to share with all those who need our interface. All you have to do after downloading the config.php change the URL to the Apache and php fpm status page and that’s it.
Here is link to Github project where you can download it.